
Can a Small Block Chevy Be Built for Economy? Part 1
Al Ritter
I have been the owner of a 1965 El Camino for over 10
years, and to be honest it’s become dated. The original hi-compression (11 to
1) over cammed engine has become finicky and almost impossible to tune with
today’s gas, and the iron heads certainly have promoted detonation. The M-20 4
speed trans and the 3:73 rear axle have teamed up with the engine to return a
miserable 11 MPG with a light right foot on the highway and an even more
miserable 8MPG around town. If all my modifications work the way I intend them
to, I expect my fuel mileage to increase to 25MPG.
 |
| Engine bay painted and awaiting new engine |
In today’s demands for economy and performance this is
unacceptable. What can be done with a typical small block that most consider a
poor candidate some two engine series ago? There is no doubt that a better
candidate would have been an LT-1 to LT-4 series or better still an LS series
engine complete with fuel injection.
What do you do when all your surplus parts revolve around
the basic 350 engine? Do you discard all those parts and go with an updated
engine assembly, or do you update and refine a tried and true engine combo? My
answer was simple, apply todays technologies to the old tried and true 350, and
I’ll tell you about my path and part selection as we go along.
To begin with today’s cars rely on lighter weight
materials to create a more gas mileage friendly package. Although I could swap
parts of the El Camino for fiberglass or carbon fiber, the return of gas
savings vs cost of purchase doesn’t make that a viable option. The weight of
the El Camino is -------- and although that is no light weight, it rivals most
mid-size cars today. Another problem is aerodynamic drag and the front end of a
1965 El Camino is certainly no 2014 Corvette! Unfortunately there isn’t much we
can do about that other than maybe add a front spoiler, but we will handle that
at a later point in time as we fine tune the combo.

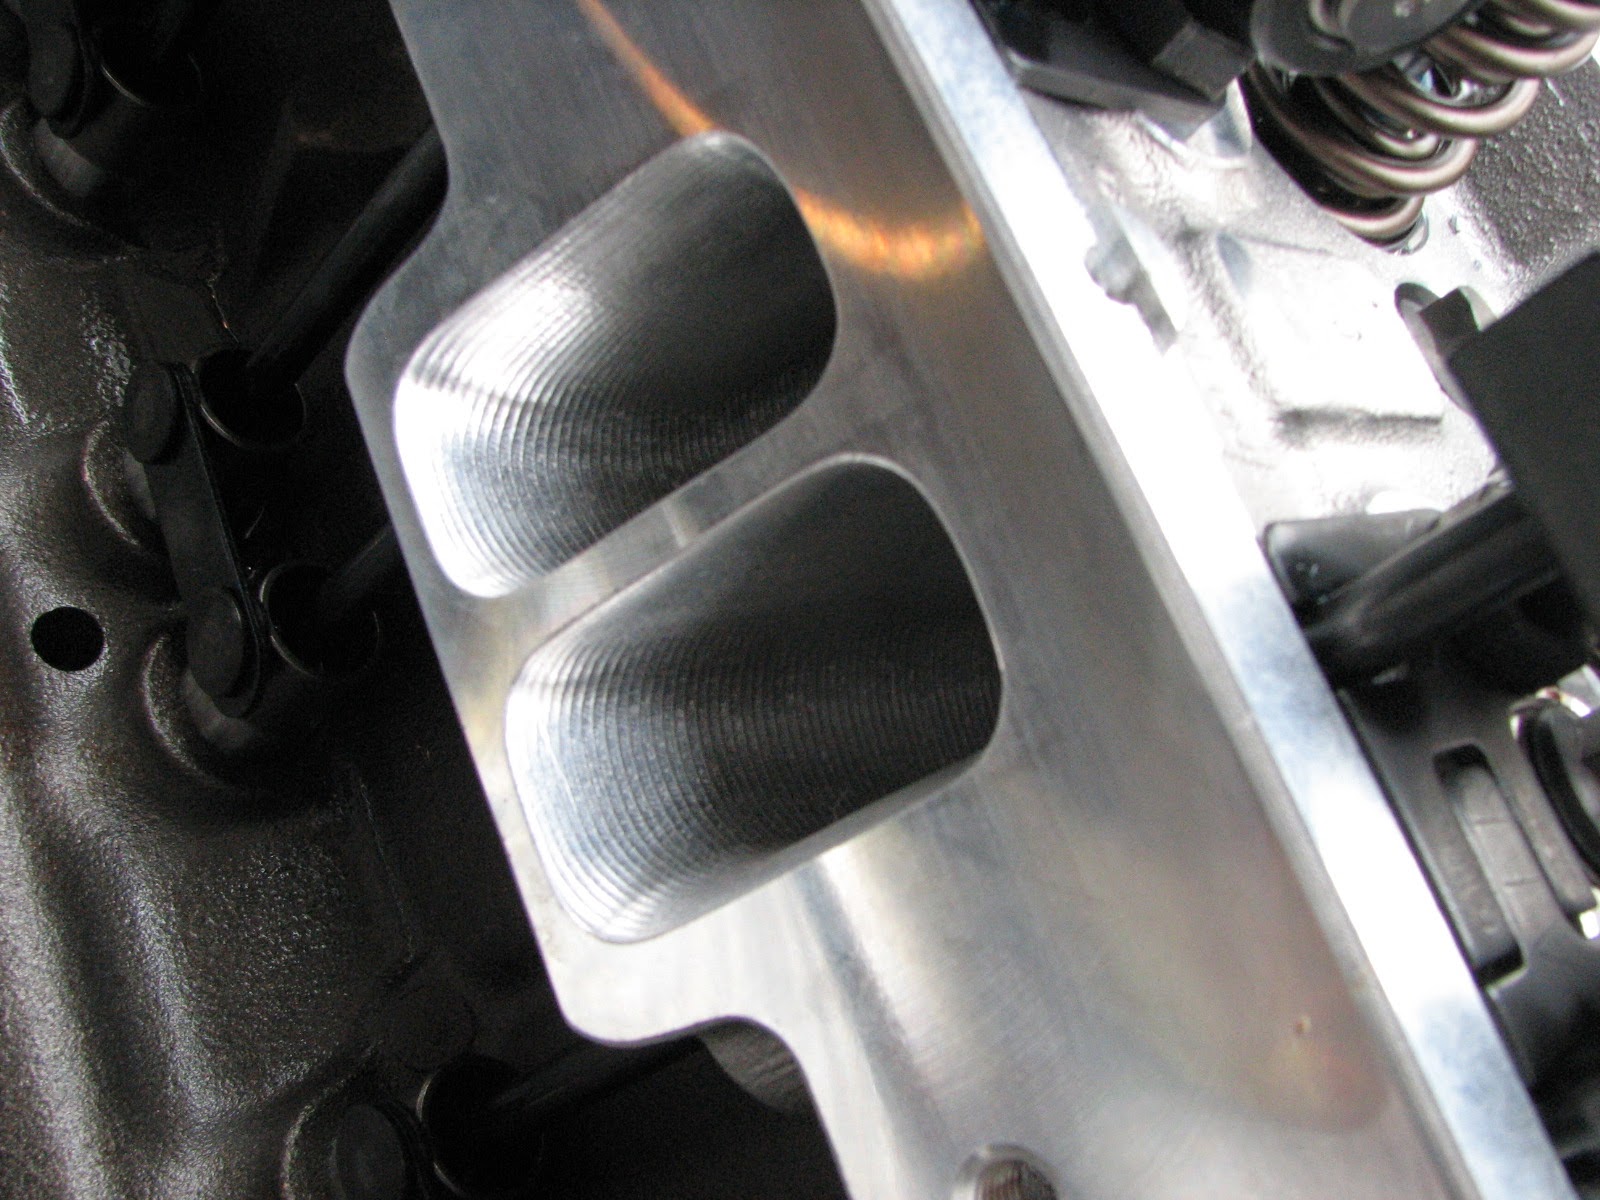 |
| Full CNC ported |
The engine a 040 over 350 will displace 357 cu in. It has
a factory forged crank and will house Mahle slightly dished pistons (approx. 9
to 1) that will have a low drag coated skirt and thin rings. This will allow me
to run 87 octane fuel another target of mine. I will also be using a 6.0 rod.
AFR heads will promote a swirl port design (65 cc) and will have a small high
velocity runner 180cc part number #916. This head features a straight plug
design to be used with the existing cast iron manifolds that I had extrude
honed years ago and work very well. I will be using a state of the art
hydraulic roller camshaft from Comp Cams. No standard on the shelf design has a
primary intent to give high miles per gallon so a custom grind had to be made,
and these are the specifications, .500 on both the intake and exhaust with the
1.6 rockers, duration is 194 degrees on the intake and 206 on the exhaust, and the
overlap is 110 degrees. The heads will be ordered direct from AFR with lower
weight beehive type LS valve springs set at 125lb. seat pressure. Everything
that is low friction will be utilized including bearings and rings and things
like a Moroso oil pan with a built in windage tray. While initial break in will
be done with a high zinc motor oil, it will be later changed to a full
synthetic.
 |
| FAST EZ EFI kit and my manifold (not supplied in kit) |
 |
| Filter and Pump |
I will be using a factory dual plane 1969 Z-28 302 intake
with a state of the art FAST EZ EFI fuel injection retrofit system. This system
is an easy to install closed loop throttle body to replace the carburetor. Most
of the electronics and sensors are hidden nicely within the design and are well
hidden. It comes with a hand held programming screen that will have me up and
running with minimal programming effort. Once running the system will be
self-learning to maximize the ability to run with performance and fuel economy
in mind. Once that system has learned the car, final micro tuning can be done to
hit an exact A/F ratio set by the owner, perfect for my aim as an
econo-machine! Although emissions aren’t considered in my state for a vehicle
this old, I’m sure with the addition of catalytic convertors it would fall
within acceptable parameters. Installation isn’t especially hard, just
involved. The fuel system is supplied with the kit, 3/8 fuel injection compliant rubber hose with an assortment of press lock AN fittings. Luckily the car had a sump welded into the tank by a previous owner so the line kit could be easily setup from that point. The pump and filter is a simple affair and was attached to the gas tank crossmember.
 |
| pickup and pump |
 |
| original fuel line used as return |
A return line had to be used so the old feed line was used after a quick blow with an air gun to remove the nylon screen from the end in the tank.
 The wiring harness has rather bulky connectors on both ends and FAST
supplies you with a HUGE grommet for the firewall requiring a 2 1/8” hole to be
drilled! Once the harness has been fed into the grommet you are left with ¾” of
conduit in a 2” hole…..a tad much to “caulk.” I chose rather to buy a smaller
grommet and feed all the connectors through the firewall individually to the
underhood connections so I have less area to caulk.
The wiring harness has rather bulky connectors on both ends and FAST
supplies you with a HUGE grommet for the firewall requiring a 2 1/8” hole to be
drilled! Once the harness has been fed into the grommet you are left with ¾” of
conduit in a 2” hole…..a tad much to “caulk.” I chose rather to buy a smaller
grommet and feed all the connectors through the firewall individually to the
underhood connections so I have less area to caulk.
This certainly challenged my patience, but made for a much cleaner installation in an area that would be seen by the general public. Mounting the handheld controller for the unit proved difficult because of the curved dash for the 65 Chevelle. Although not required for daily operation, constant real time monitoring is a welcome relief to the idiot lights that was original equipment on the Chevelle. The controller has two cables, one for the telemetry and the other for power through a cigarette lighter. I have cut the lighter connection off and hard wired it into the fuse box. The controller will be mounted via Velcro to the bottom of the dash and a/c unit. Initial indications of self-learning were apparent right off the bat as the idle air controller took over and settled the engine speed to the preset idle rpm.
 A fitting for the oxygen sensor had to be drilled and welded into the head pipe after following the instructions for distance and angle, this seemed to be the best out of the way place for the installation.
 After almost 3 hours run time I had noticed that the cold start portion of the program left a lot to be desired, so I called the FAST tech number and explained the problem. He told me that the instructions needed rewriting concerning the adjustment for the throttle body blade adjustment. He wanted me to run the engine until hot and oxygen sensor was active. Then go to the live data section and observe the IAC count. He told me that if I had originally used the instructions to adjust them the count would be in the 30-40 range (which it was.) He told me to use the IAC count to adjust the throttle blades to somewhere in the 15-20 range. That seemed to help the cold start problems immensely.


Other companies had told me that the TKO Tremec
transmission wouldn’t fit into the “A” body GM car without major floor
modifications. American Powertrain informed me that because of their factory
approved transmission case streamlining program the modifications would be
minimal at worst. I installed the transmission and bellhousing onto the engine
to be installed as one unit. Because of additional length of the transmission
this made the combined installation tricky to say the least. Even with my state
of the art tilting engine crane the entire assembly had to be swung sideways to
make it into the body combo. Once the transmission was in the tunnel things
improved. Only one bolt touched inside the tunnel and the additional clearance
was accomplished with a simple bottle jack and a piece of 5/8” round bar stock.
The shifter is pretty cool and offers 16 different possible combinations to
accommodate almost any body style.
 The shifter (a short handled Hurst style
clone) fit right into my existing factory style hole. The transmission requires
a GM equivalent fluid to properly break in the synchronizer set, and 2 quarts
were added to be later changed after proper break in procedure with an approved
Mobil 1 synthetic. A custom driveshaft and yoke was supplied as part of the kit
and after a few simple measurements, one arrived at my door within 3 days! A
work of advice when ordering the driveshaft according to the instructions
supplied with the kit…..subtract an inch from your final measurement as my
driveshaft is a bit too long.
The shifter (a short handled Hurst style
clone) fit right into my existing factory style hole. The transmission requires
a GM equivalent fluid to properly break in the synchronizer set, and 2 quarts
were added to be later changed after proper break in procedure with an approved
Mobil 1 synthetic. A custom driveshaft and yoke was supplied as part of the kit
and after a few simple measurements, one arrived at my door within 3 days! A
work of advice when ordering the driveshaft according to the instructions
supplied with the kit…..subtract an inch from your final measurement as my
driveshaft is a bit too long.
A custom polyurethane trans mount was supplied
with the kit and after finding two non-supplied metric Allen headed fasteners
the install was simple. The crossmember frame mounts had to be redrilled to accommodate
the longer length of the transmission, but no big deal. The supplied clutch
seems to have a bit more chatter than I’d prefer but it has a 200 mile break in
period so I’ll wait until that period has passed before making my final
judgment. The reverse light switch was faulty from the factory and a
replacement had to be ordered. As it turns out the reverse light switch wasn’t
bad. There were two electrical connections on the transmission, one on the end
of the transmission tailshaft that had a harness attached and one farther up in
the middle of the driver’s side that had no harness. The instructions never
really said which one was the reverse light switch, and I had assumed that the
one on the tailshaft was the reverse light switch, well you know what they say
about the word “assume.” I now know it was the one in the middle of the trans
on the driver’s side……..you have been warned!
 |
| Poly Transmission mount |
Michelin Pilot Super Sport tires will replace the
original setup originally purchased 14 years ago. Michelins were picked for
their longevity, rolling resistance and traction ratings on both dry and wet
surfaces. 225 45R x 18 for the front and 245 45R x 18’s for the rear.
You Tube video:
https://www.youtube.com/watch?v=6Q_VVfCzEUY&list=UUCKaLG_zwxF6kLp9AiUgbcw
You Tube video:
https://www.youtube.com/watch?v=6Q_VVfCzEUY&list=UUCKaLG_zwxF6kLp9AiUgbcw

2 comments:
WAY OVER MY HEAD, BUT ALL THE BEST HOPE IT WORKS
Very cool Al. You'll at least get close to your goal out of the box.
Post a Comment